Configure External Candidate Import from Textkernel Source🔗
This section describes the steps to set up the external candidate import feature, which is part of Textkernel Source product. Recruiters use Textkernel Source to find candidates in external candidate databases outside of their ATS candidate database. This feature allows recruiters to import the external candidate profiles and easily create candidate records inside their Salesforce ATS.
Recruiters search for external candidates in Textkernel Source. When they find interesting Candidates, they can import them by selecting the profiles and clicking "Import selection":
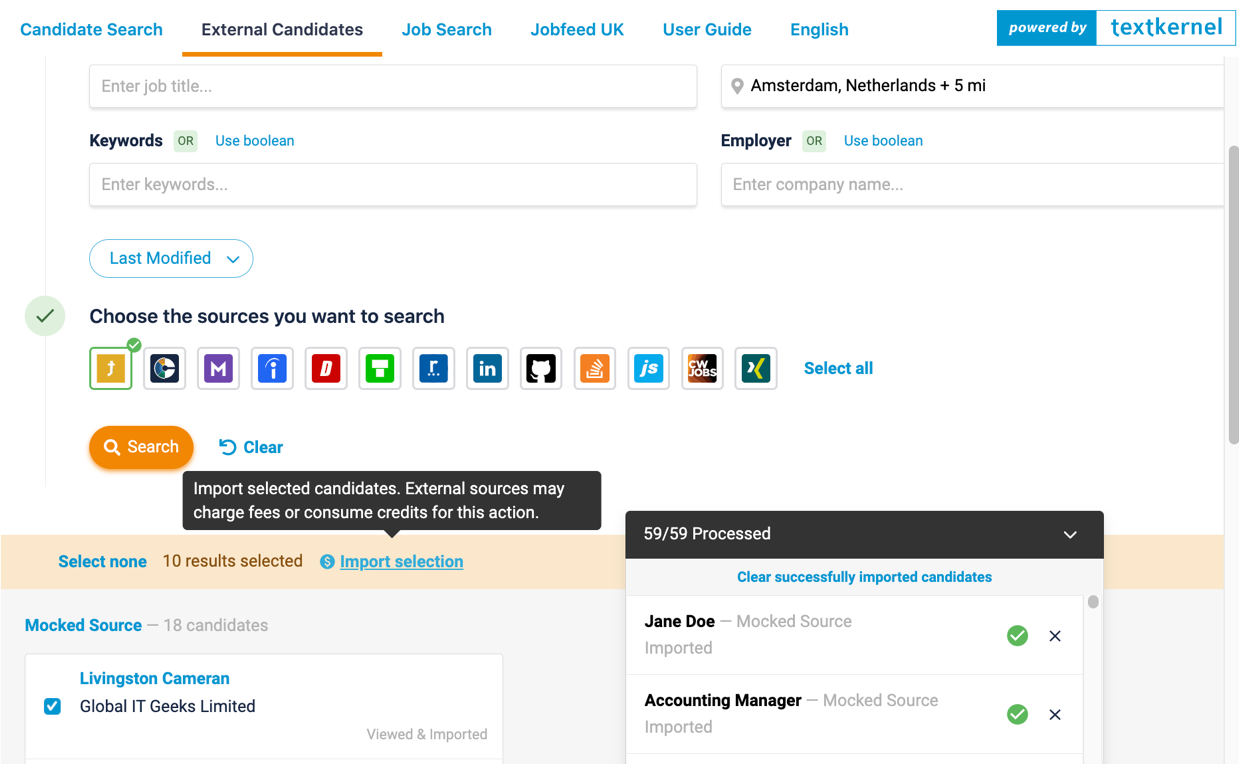
Selected external profiles are loaded into the Salesforce ATS and use the same Candidate data mapping, profile review, and duplicate record-checking features available in the recruiter CV parsing flow.
This feature implements Textkernel's automation API, which is an event-driven API that pushes data from Textkernel into an ATS. Once configured properly, Salesforce exposes an OAuth 2.0 protected webhook endpoint, which Textkernel uses to push external candidate profiles into Salesforce. Afterwards, when Salesforce is processing the external candidates, if a binary CV/resume is available, Salesforce makes a call to Textkernel's binary file retrieval endpoint to retrieve the file. Altogether in this procedure we will configure two OAUTH-2 protected endpoints.
Info
More details about how to monitor this process and reset errors are provided in the Operational Guide
Important
This feature makes REST api calls into Salesforce. Based on your Salesforce license and user count you have a limited daily allocation.
Important
Both this external Candidate import feature, and the Reruiter CV Parsing workflow attach new CV/resume files as ContentVersion records. Salesforce sets daily limits on how many ContentVersions your org can publish. Production orgs have a large daily limit of several hundred thousand. However, if you are using a Developer org or Trial org, and you attempt to import thousands of records you could hit the limit. If that happens, you can submit a ticket to Salesforce to raise the org limit. Please refer to the Salesforce documentation for more information.
Configure the OAuth 2.0 Connected App and Automation API Webhook🔗
The Salesforce webhook is used by Textkernel to push events into Salesforce. The setup procedure is documented in Configure Connected App and Automation API Webhook within the Basic Textkernel Connector setup guide within this Admin installation guide.
As part of that procedure, you will configure the integration user and provide the following information to Textkernel:
- OAuth 2.0 Consumer Key
- OAuth 2.0 Consumer Secret
- OAuth 2.0 Token URL
- Salesforce Webhook URL
Configure External candidate importing🔗
Next you need to configure what happens with the external candidate profiles when you receive them over the webhook.
The process to import external candidate profiles is similar to the process from the recruiter CV parsing feature, with some minor differences. This shared approach means recruiters can re-use the same duplicate-checking, and candidate-review approach for candidates coming from both workflows.
-
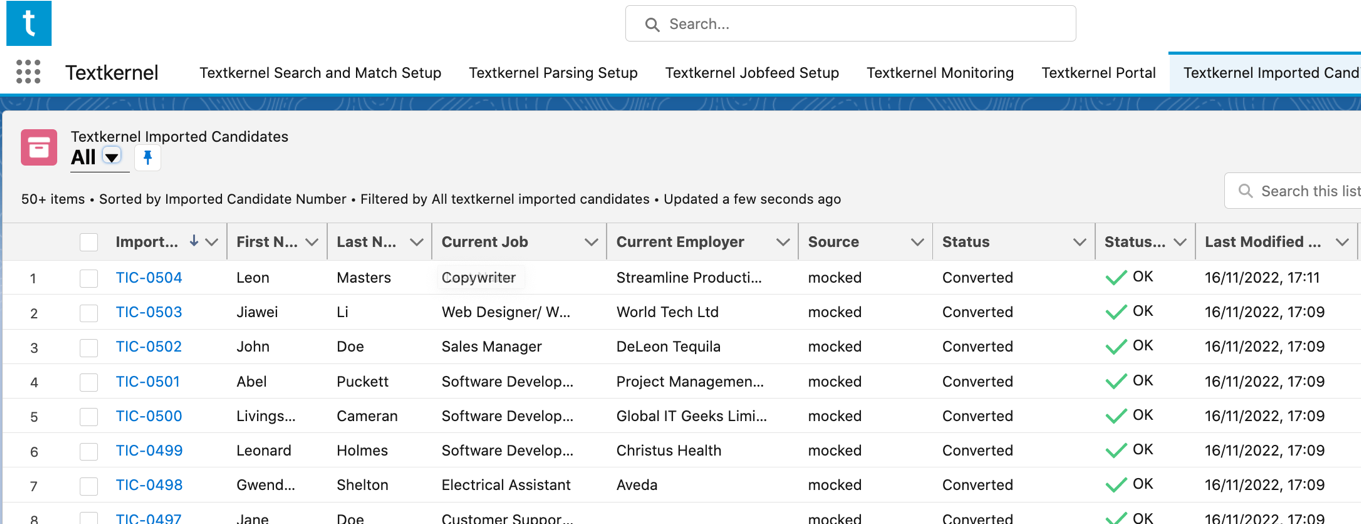
When first imported, the external candidate is created as a Textkernel Imported Candidate, with the Imported status. The structured data is present, but it is not yet added to the Textkernel Imported Candidate.
-
A Schedulable APEX job checks periodically for new Imported external Candidate profiles, loads the structured data onto the Textkernel Imported Candidate, and retrieves the CV/Resume binary from Textkernel, if available. The Textkernel Imported Candidate record is then assigned the Parsed status.
-
You can optionally use an automated Flow that uses the Candidate Data Mapping to map from the Textkernel Imported Candidate to your ATS's Converted Candidate. At the end of that process the Converted status is assigned. (Refer to the recruiter CV parsing documentation for information on how to configure those features).
Configure binary retrieval🔗
The first part of configuring this process is to configure how the integration will retrieve the CV/resumes from Textkernel. Textkernel support will provide this information to you. You will receive the following information:
- Client Id
- Client Secret
- Token retrieval endpoint
-
Binary retrieval endpoint
-
Add both the binary retrieval and token retrieval endpoints to your remote site settings. Set this up using the standard configuration feature located under Salesforce Setup → Security → Remote Site Settings
-
Go to Parsing Setup → Parsing Settings.
-
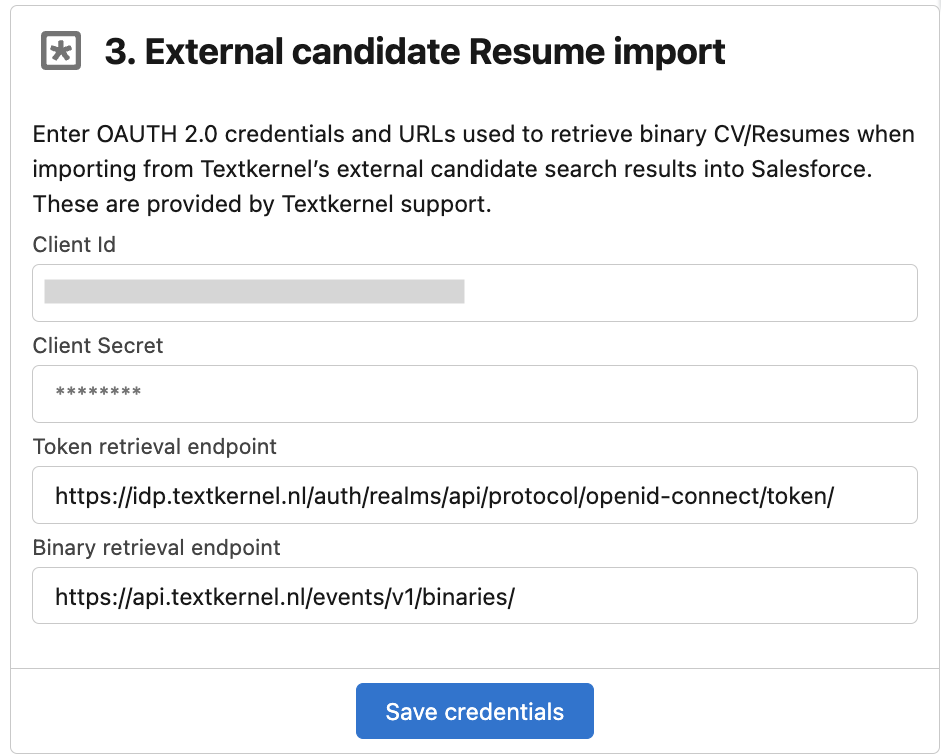
Under 3. External candidate Resume import, enter the information from Textkernel support to configure the binary retrieval:
-
Client Id
- Client Secret
- Token retrieval endpoint
-
Binary retrieval endpoint
-
Click "Save credentials".
Schedule how often to parse and convert external profiles🔗
-
Go to Parsing Setup → Parsing Settings.
-
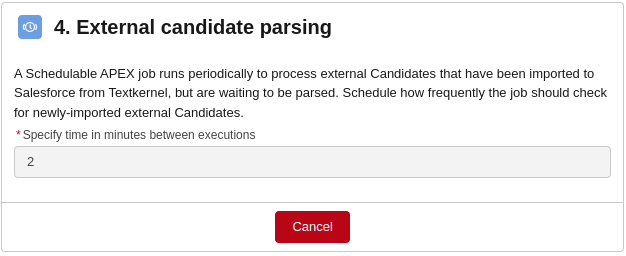
Under section "4. External candidate parsing" set a schedule for how often the integration checks for newly-imported external candidates. Pick a time in minutes between executions and click the Schedule button.
-
Under section 4. External candidate parsing, set a schedule for how often the integration checks for newly-imported external candidates. This configures a Schedulable APEX job that checks for new Imported external Candidate profiles. Pick a time in minutes between executions and click the "Schedule" button.
-
(Optional) if you want to automatically convert the Parsed record, create a Flow or APEX trigger to create the Converted Candidate records, using the APEX helper function. (Refer to the recruiter CV parsing documentation for information on how to configure those features).