Configure Recruiter CV Parsing🔗
This section describes the procedure to set up the recruiter CV Parsing use case. The parsing feature can be implemented with multiple possible workflows, so this toolkit contains a flexible set of components to cover a range of choices.
Info
More details about the parsing process, how to monitor it, and reset errors are provided in the Operational Guide
Add the Import Candidates Lightning App Page to your Recruiting Application🔗
The Import Candidates Tab is included in the package, and can be added to your Lightning Recruiter App to allow Recruiters to upload CVs and check the status of the files they have previously uploaded.
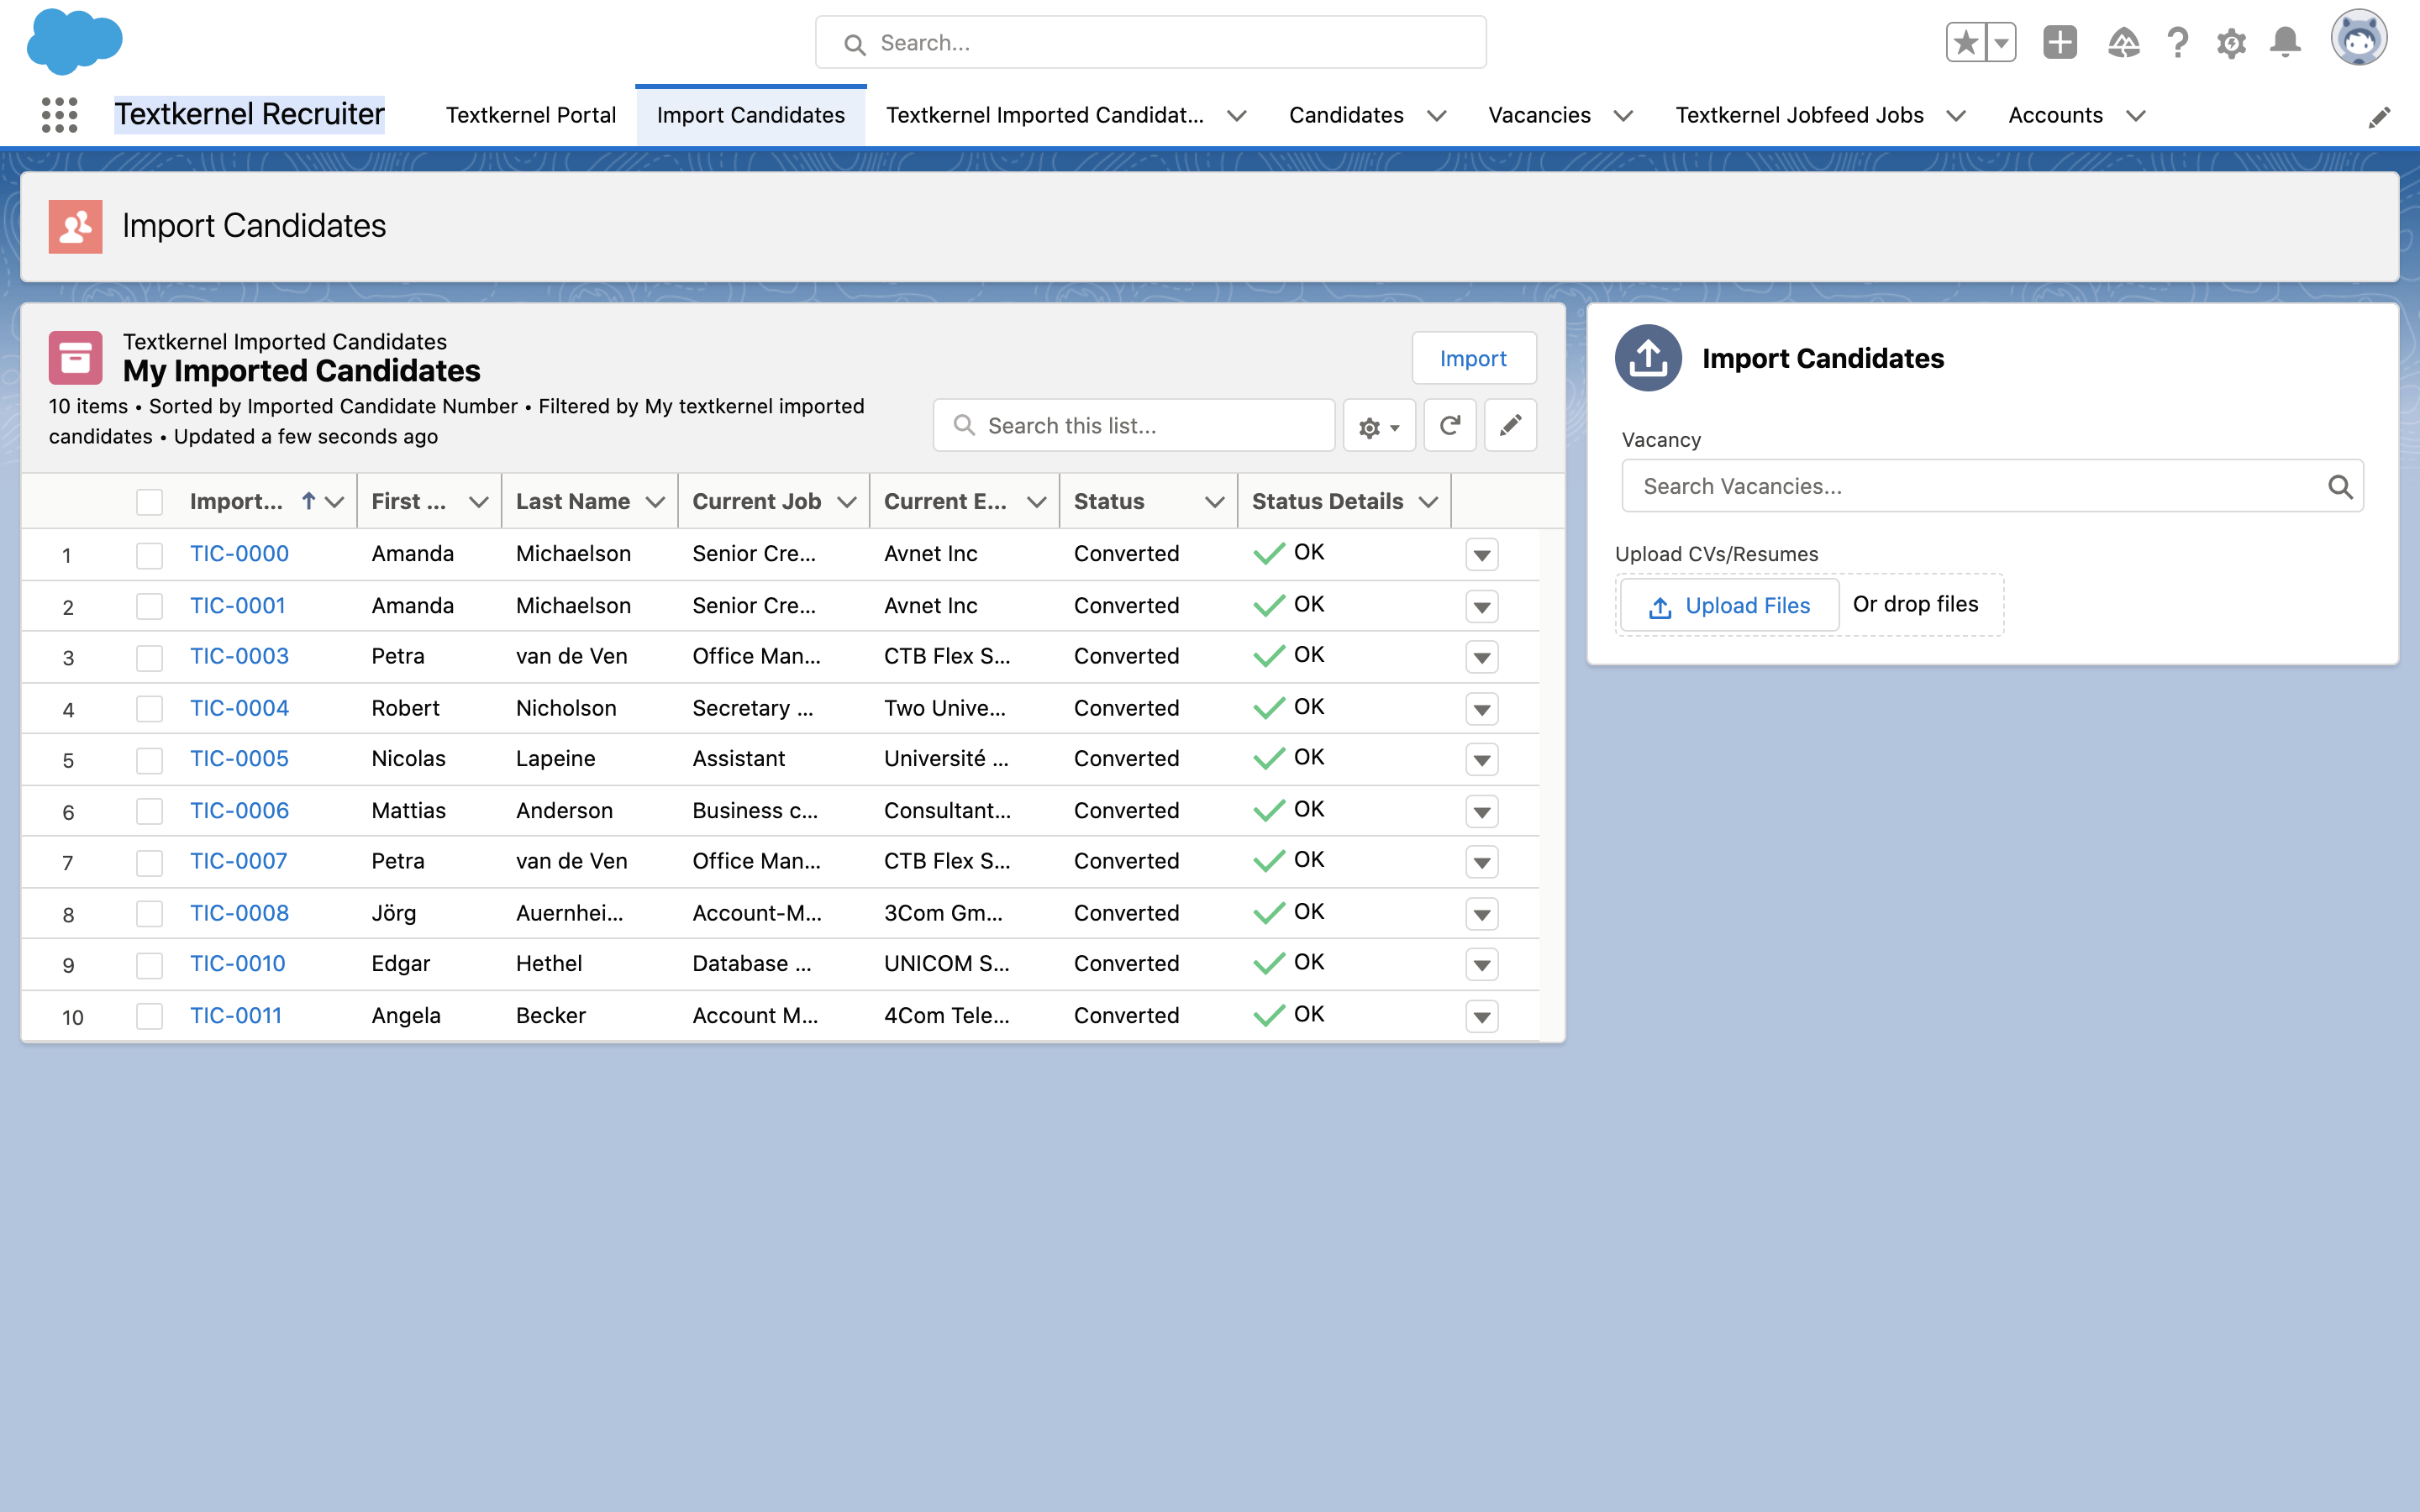
To add this Tab:
- Go to SFDC Setup → Lightning Experience App Manager
- Select right action drop-down menu, and select edit your recruiting App.
- Select “Navigation Items” on the left pane.
- Select “Import Candidates” using the Search bar.
- Click “Save” to keep your changes.
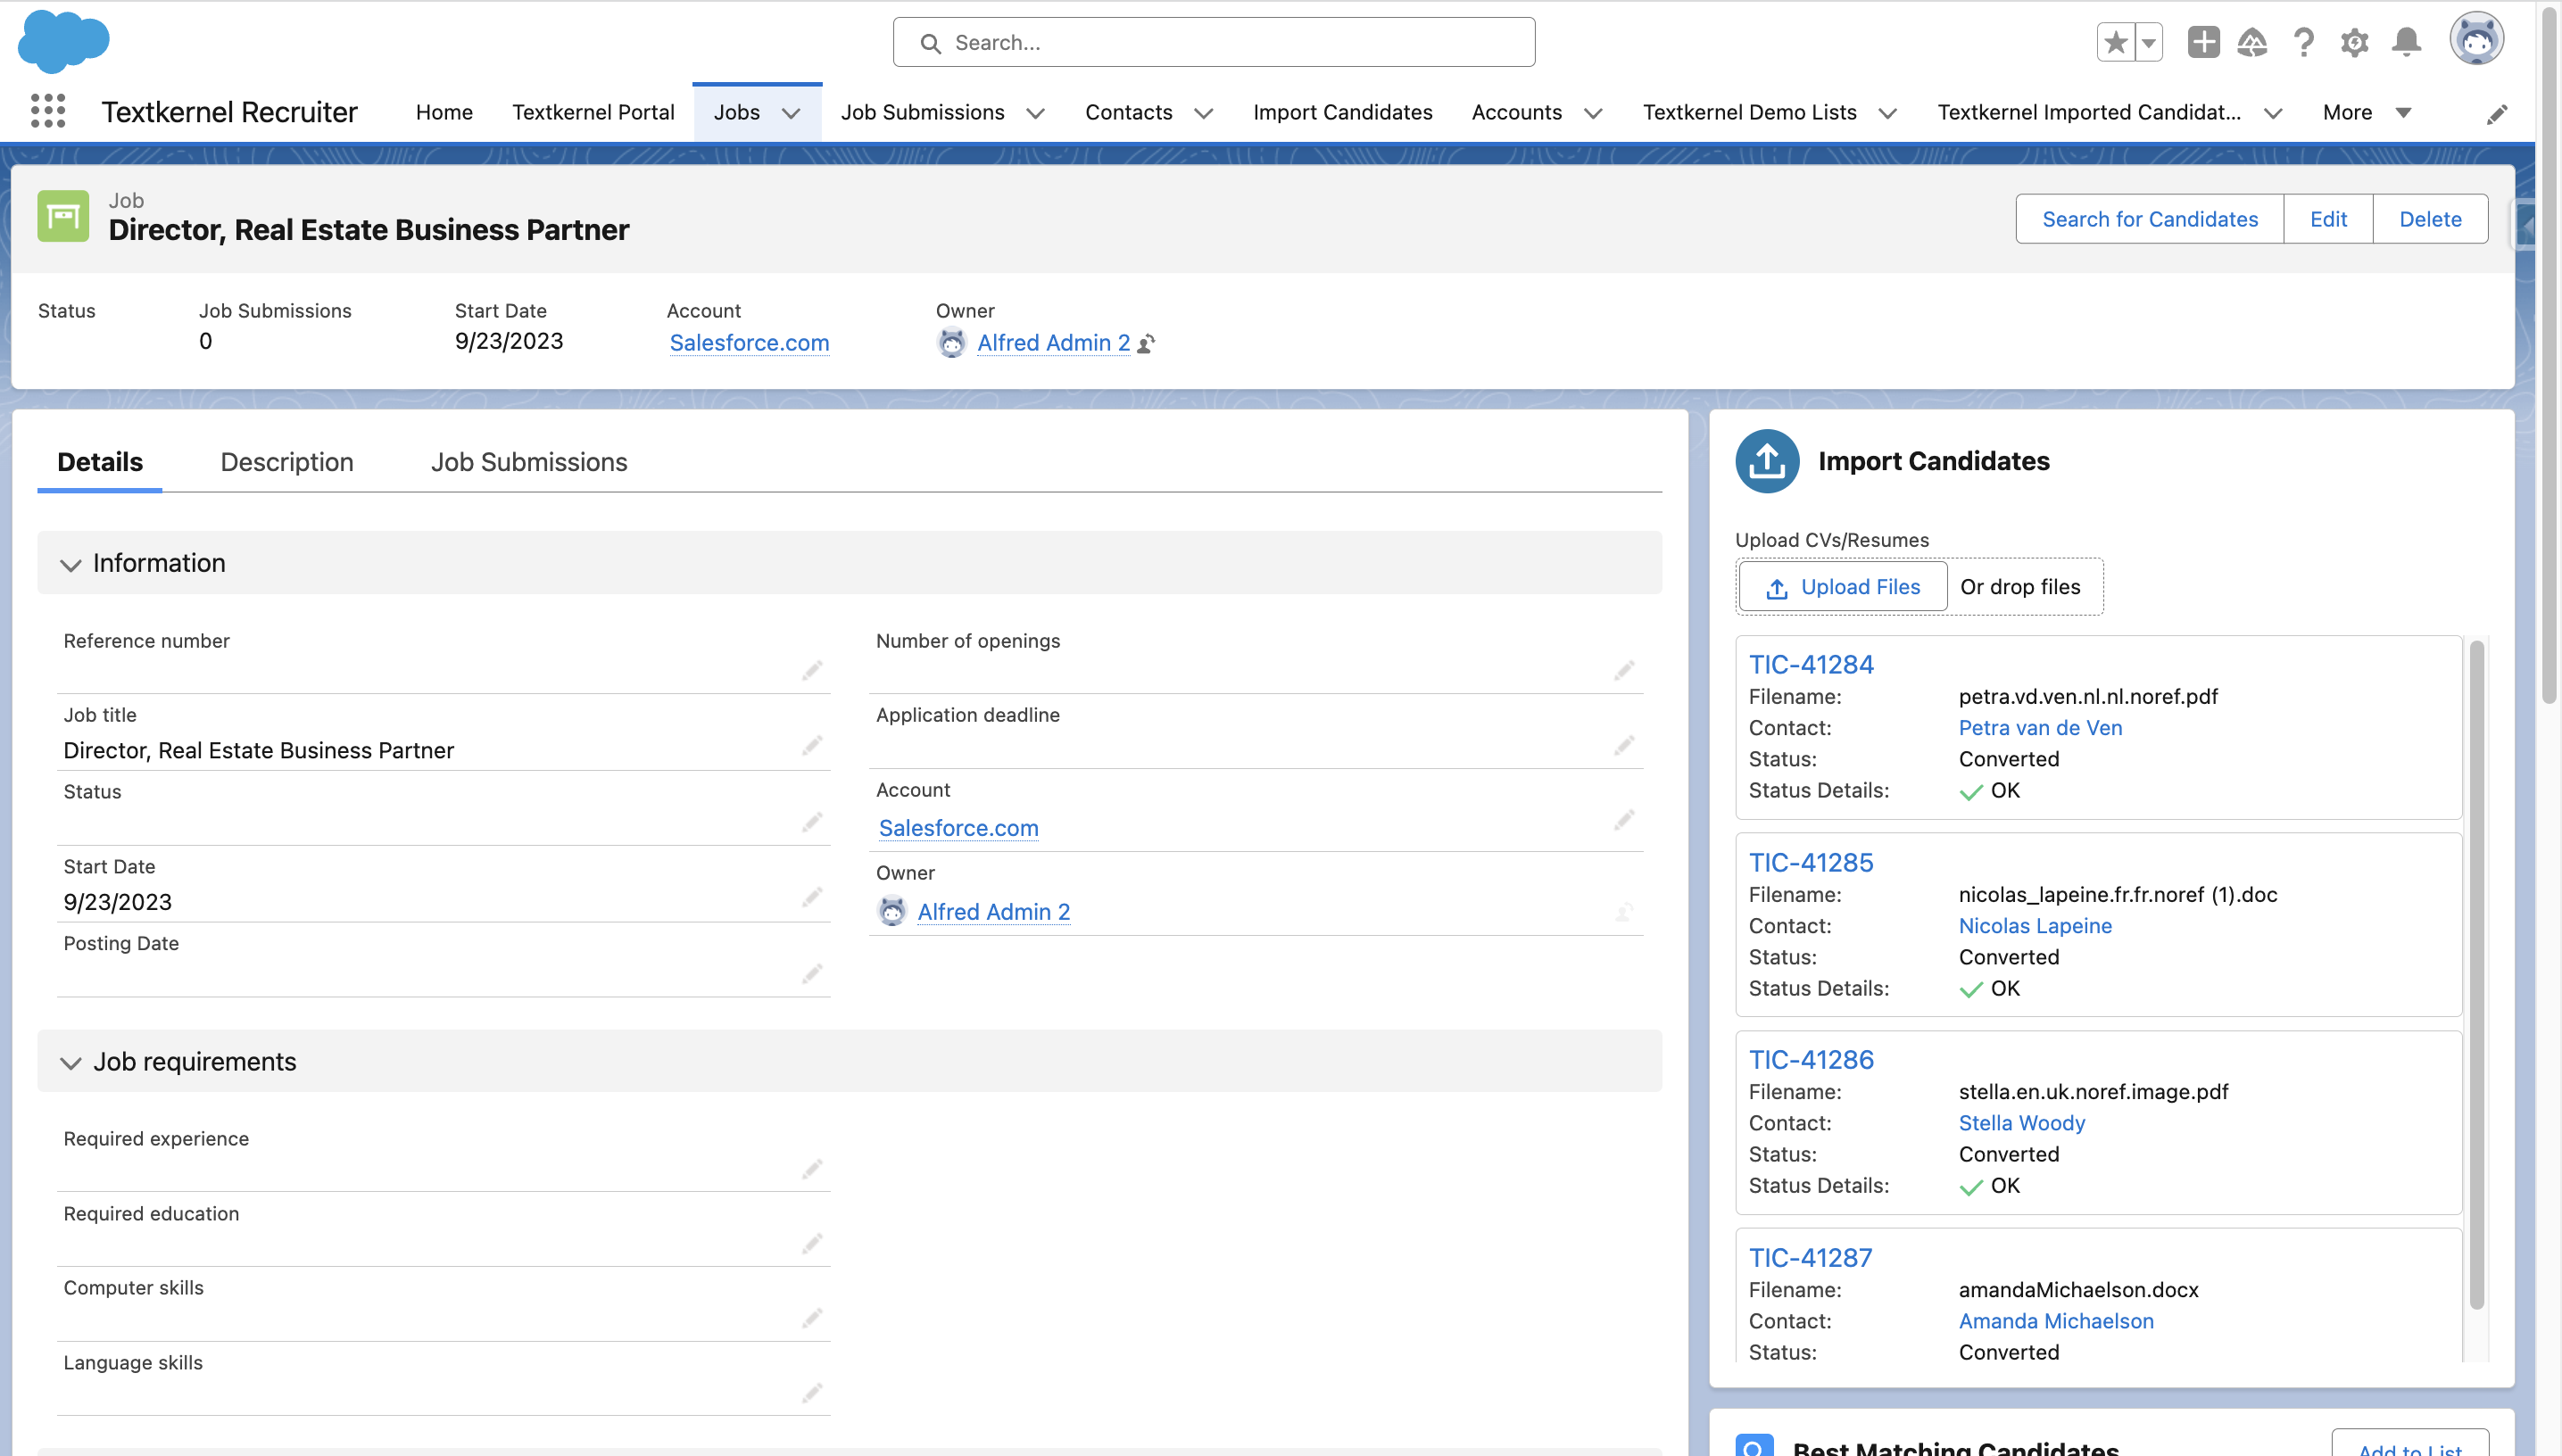
Add the Import Candidates component to your Vacancy Lightning Record Page🔗
- Go to SFDC Setup → Object Manager → Vacancy (Select whichever entity represents a Vacancy in your Salesforce environment).
- Select a pre-existing Lightning Record Page, or create a new one.
- Search for the “Textkernel Imported Candidates Document Uploader” Custom component.
- Add this to your layout where desired; the right-hand side is used in the example above.
- Save your changes
Parsing Settings Page🔗
You need to configure Salesforce to point at the correct Textkernel parsing endpoint, using the appropriate credentials to submit a CV for parsing.
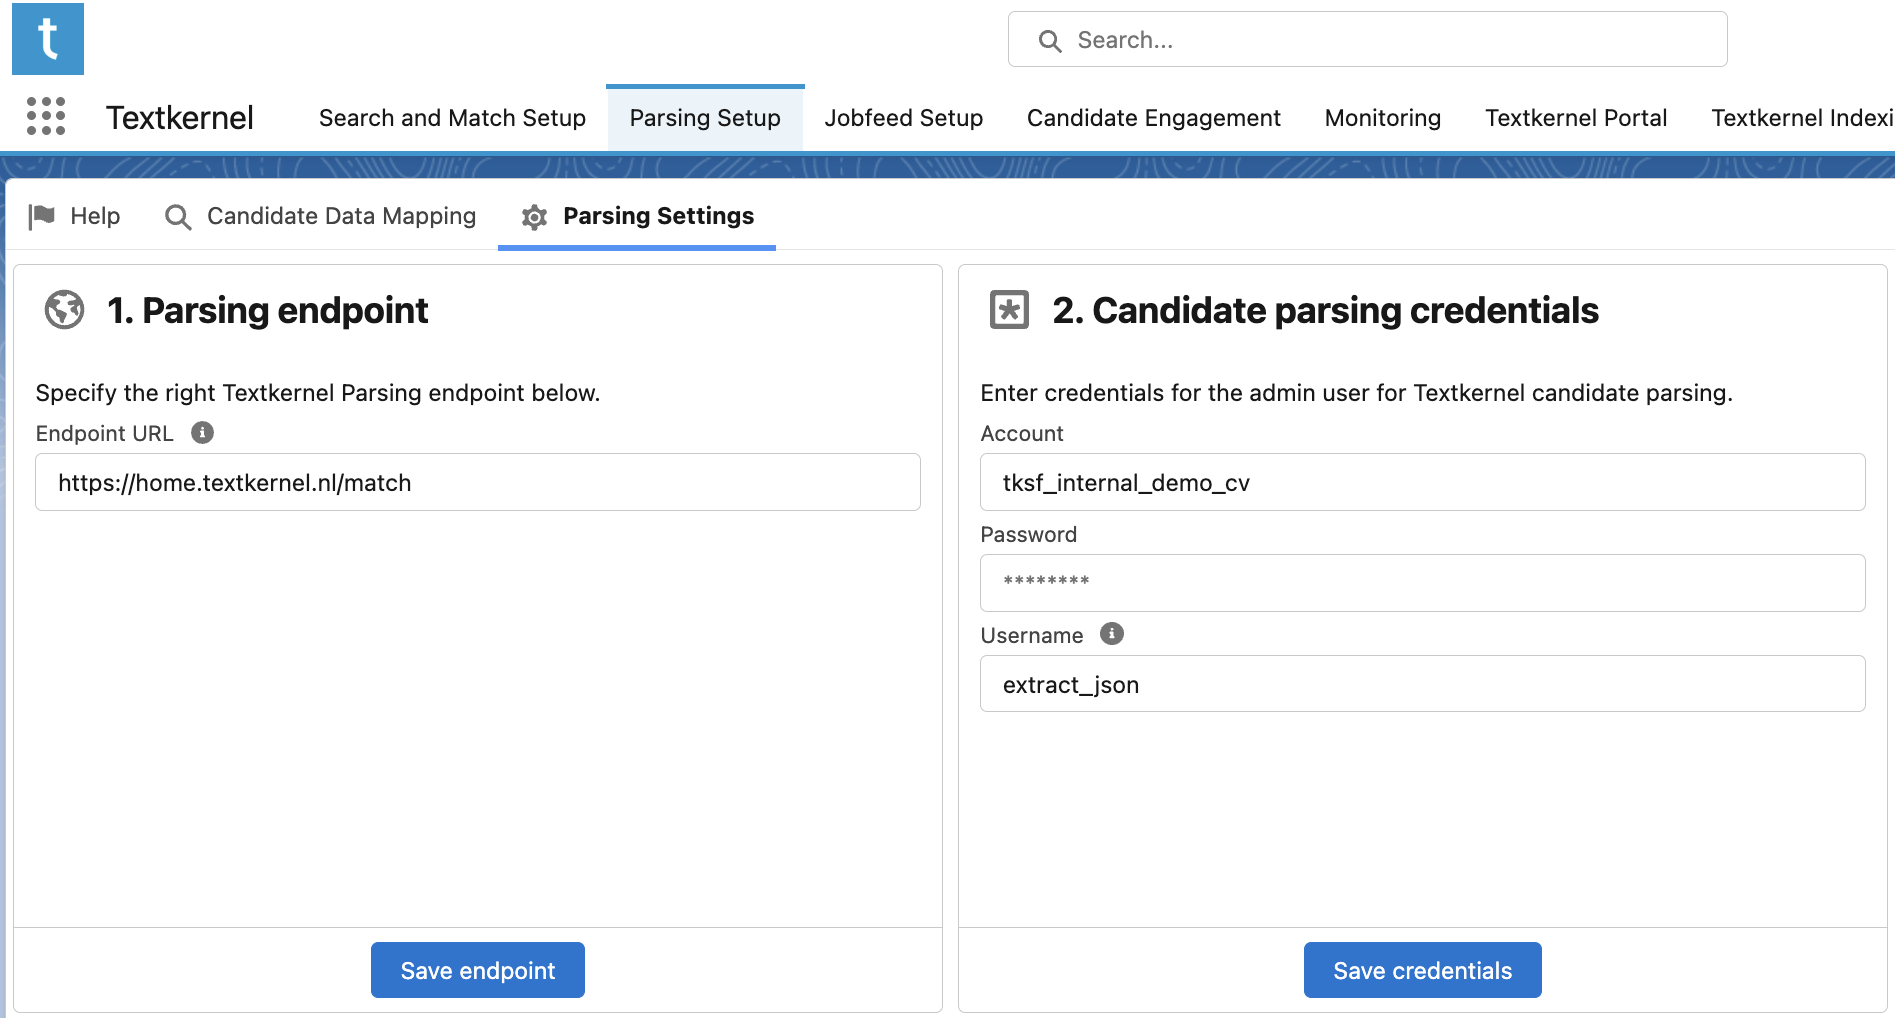
- Go to Textkernel App → Parsing Setup → Parsing Settings
- Go to the section 1. Parsing endpoint
- Type in the parsing endpoint provided to you by Textkernel support into Endpoint URL
- Click Save endpoint
- Go to the section 2. Candidate parsing credentials.
- Enter the Account and Password provided to you by Textkernel support.
- The Username is typically a default value: extract_json. In some cases (when Textkernel partners are bundling this Textkernel package to resell it with their Salesforce-based ATS) it could be a different custom value. If this is your situation, your ATS provider will tell you what to enter here.
- Click Save credentials
Map Candidate Data🔗
Go to Textkernel App → Parsing Setup → Candidate Data Mapping
This is where you map the data from the generic Textkernel Imported Candidate record to your specific Converted Candidate Record.
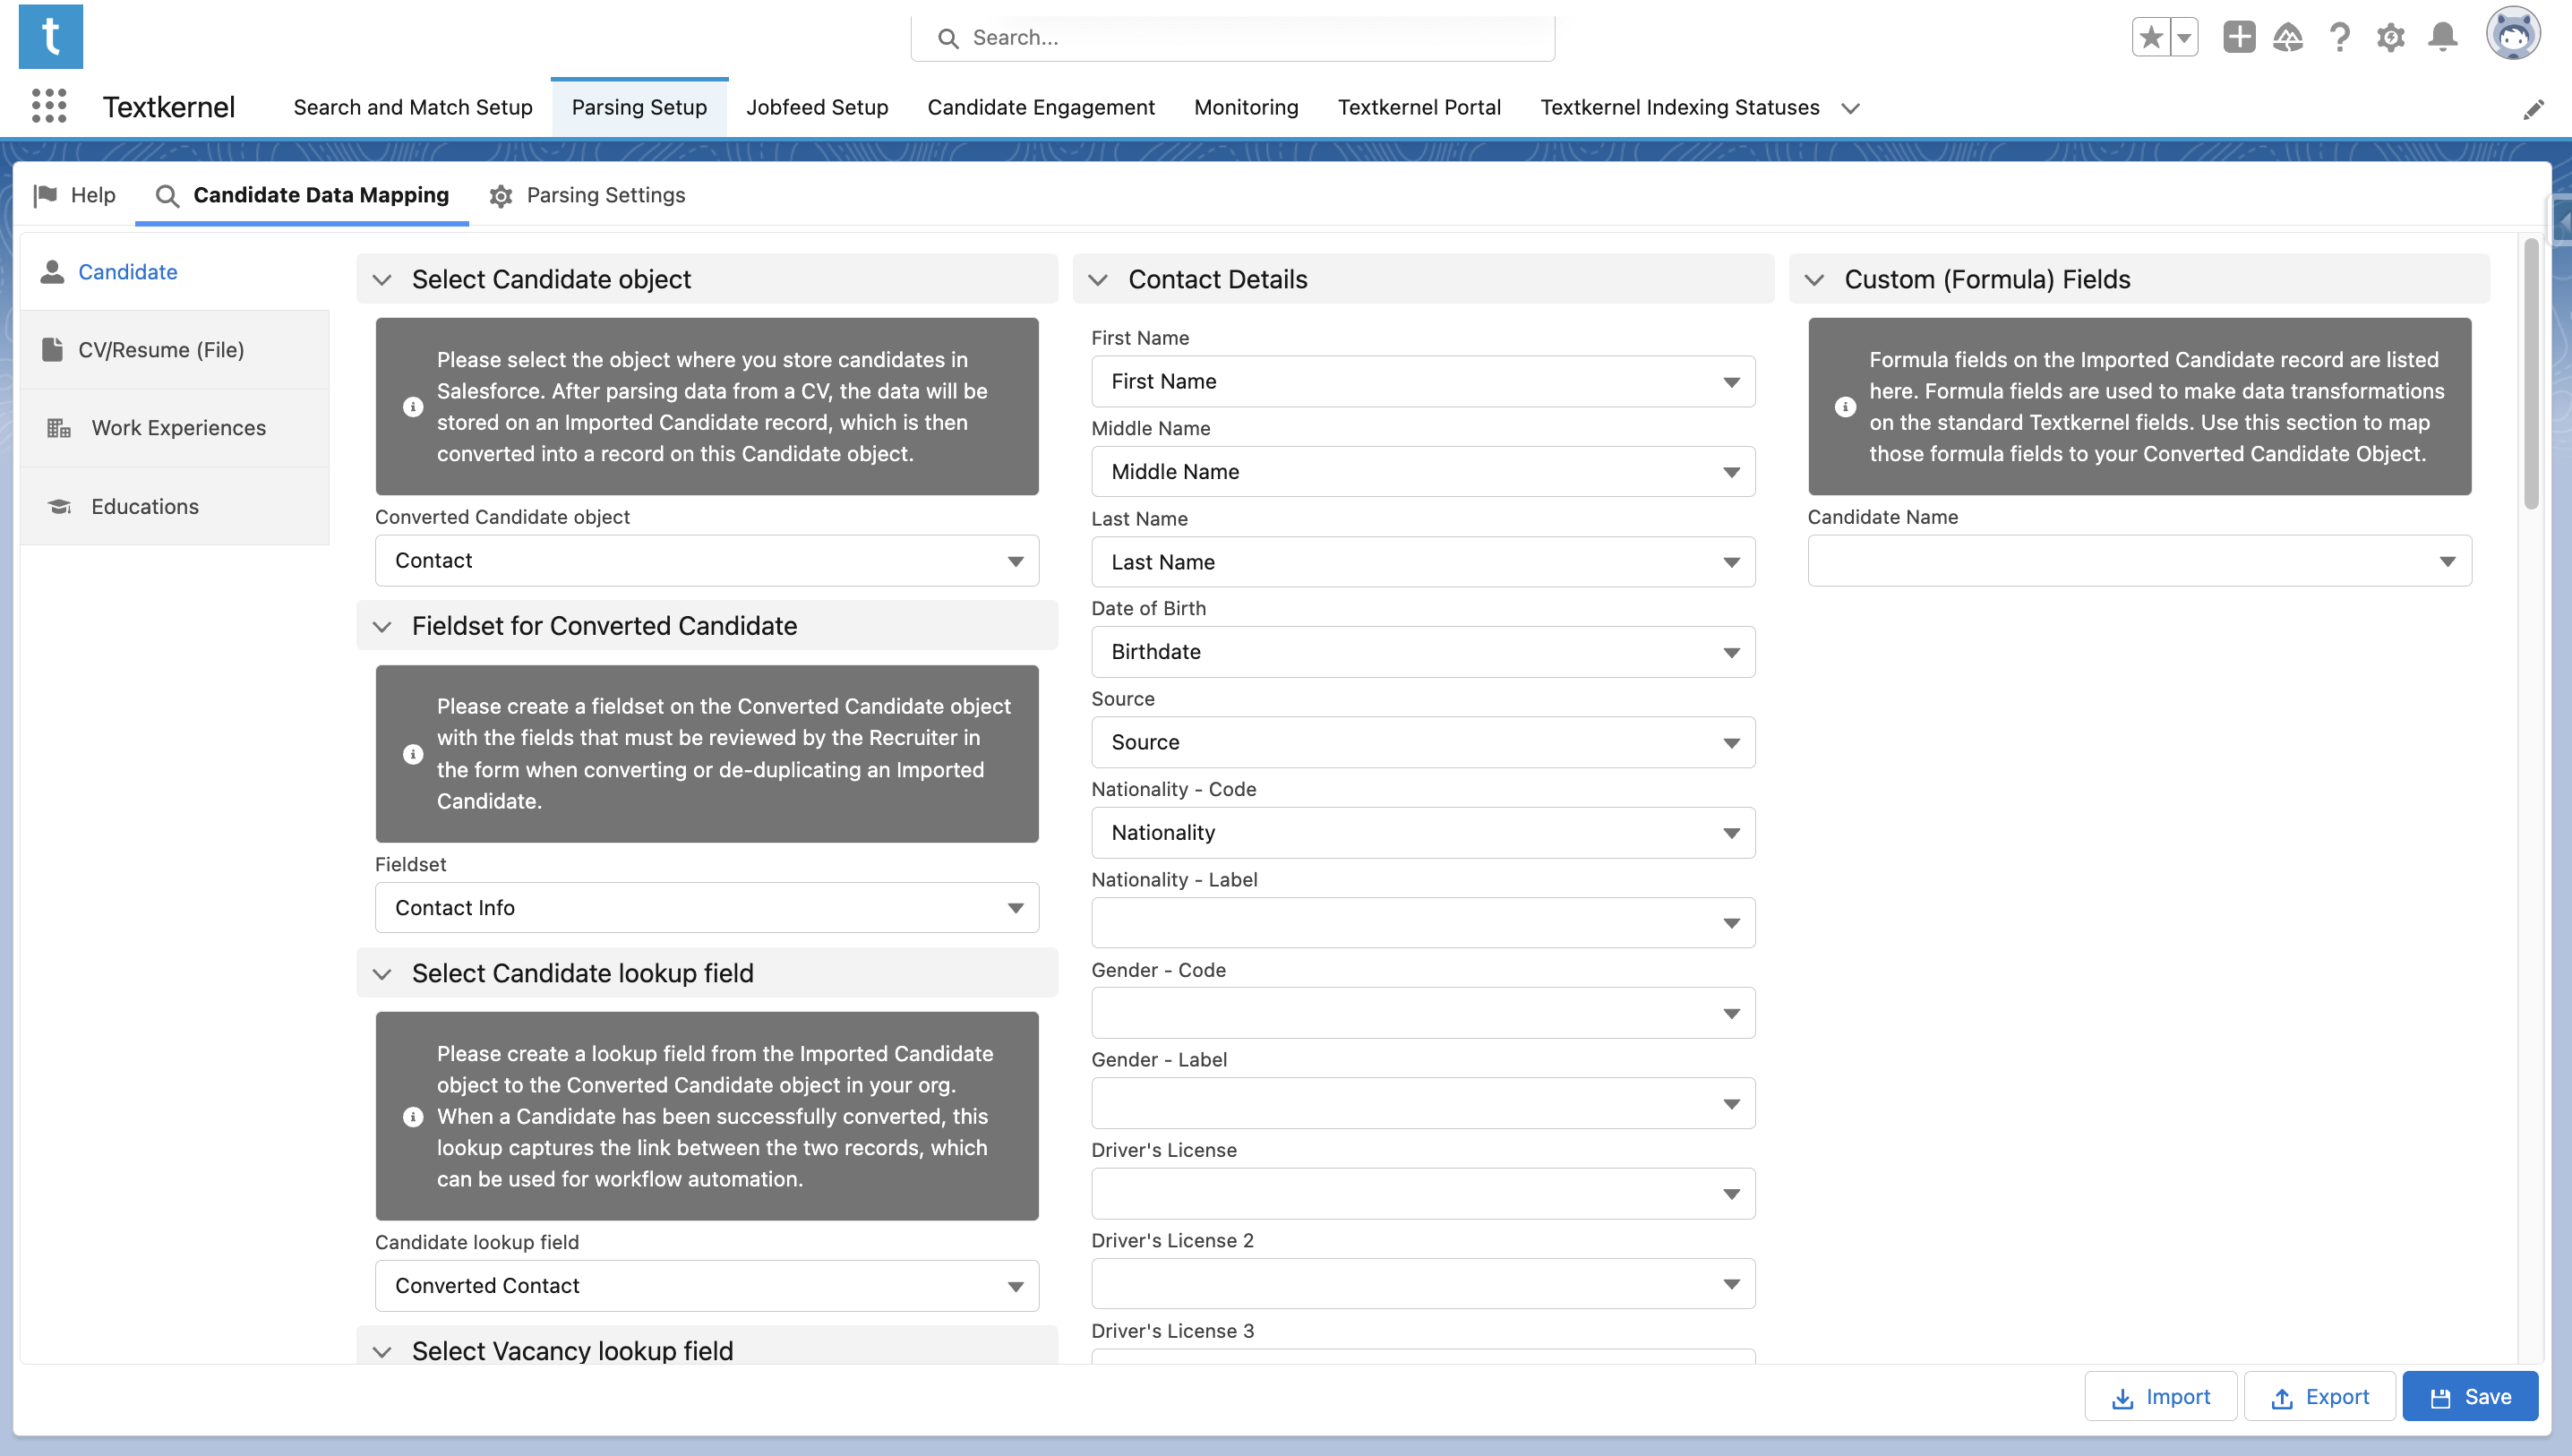
Configure base candidate mapping🔗
First select the base Candidate object. This is the primary record in your system that represents a Candidate. It could be a standard object or a custom object. After successful importing, parsing, and conversion this is the record Recruiters will access to see Candidates.
(Optional) Select Record type
If your primary Candidate record has different Record types then a menu will appear allowing you to select which Record type to use when you select the Candidate record. In this case, select the type of Record you want to create.
Select Fieldset for Converted Candidate
This fieldset is a list of fields the Recruiter should review against the Converted Candidate record, when reviewing a potential duplicate candidate. Note this fieldset is NOT on the Textkernel Imported Candidate
Only the fields in this fieldset will be presented to the Recruiter when they are reviewing and handling duplicate records:
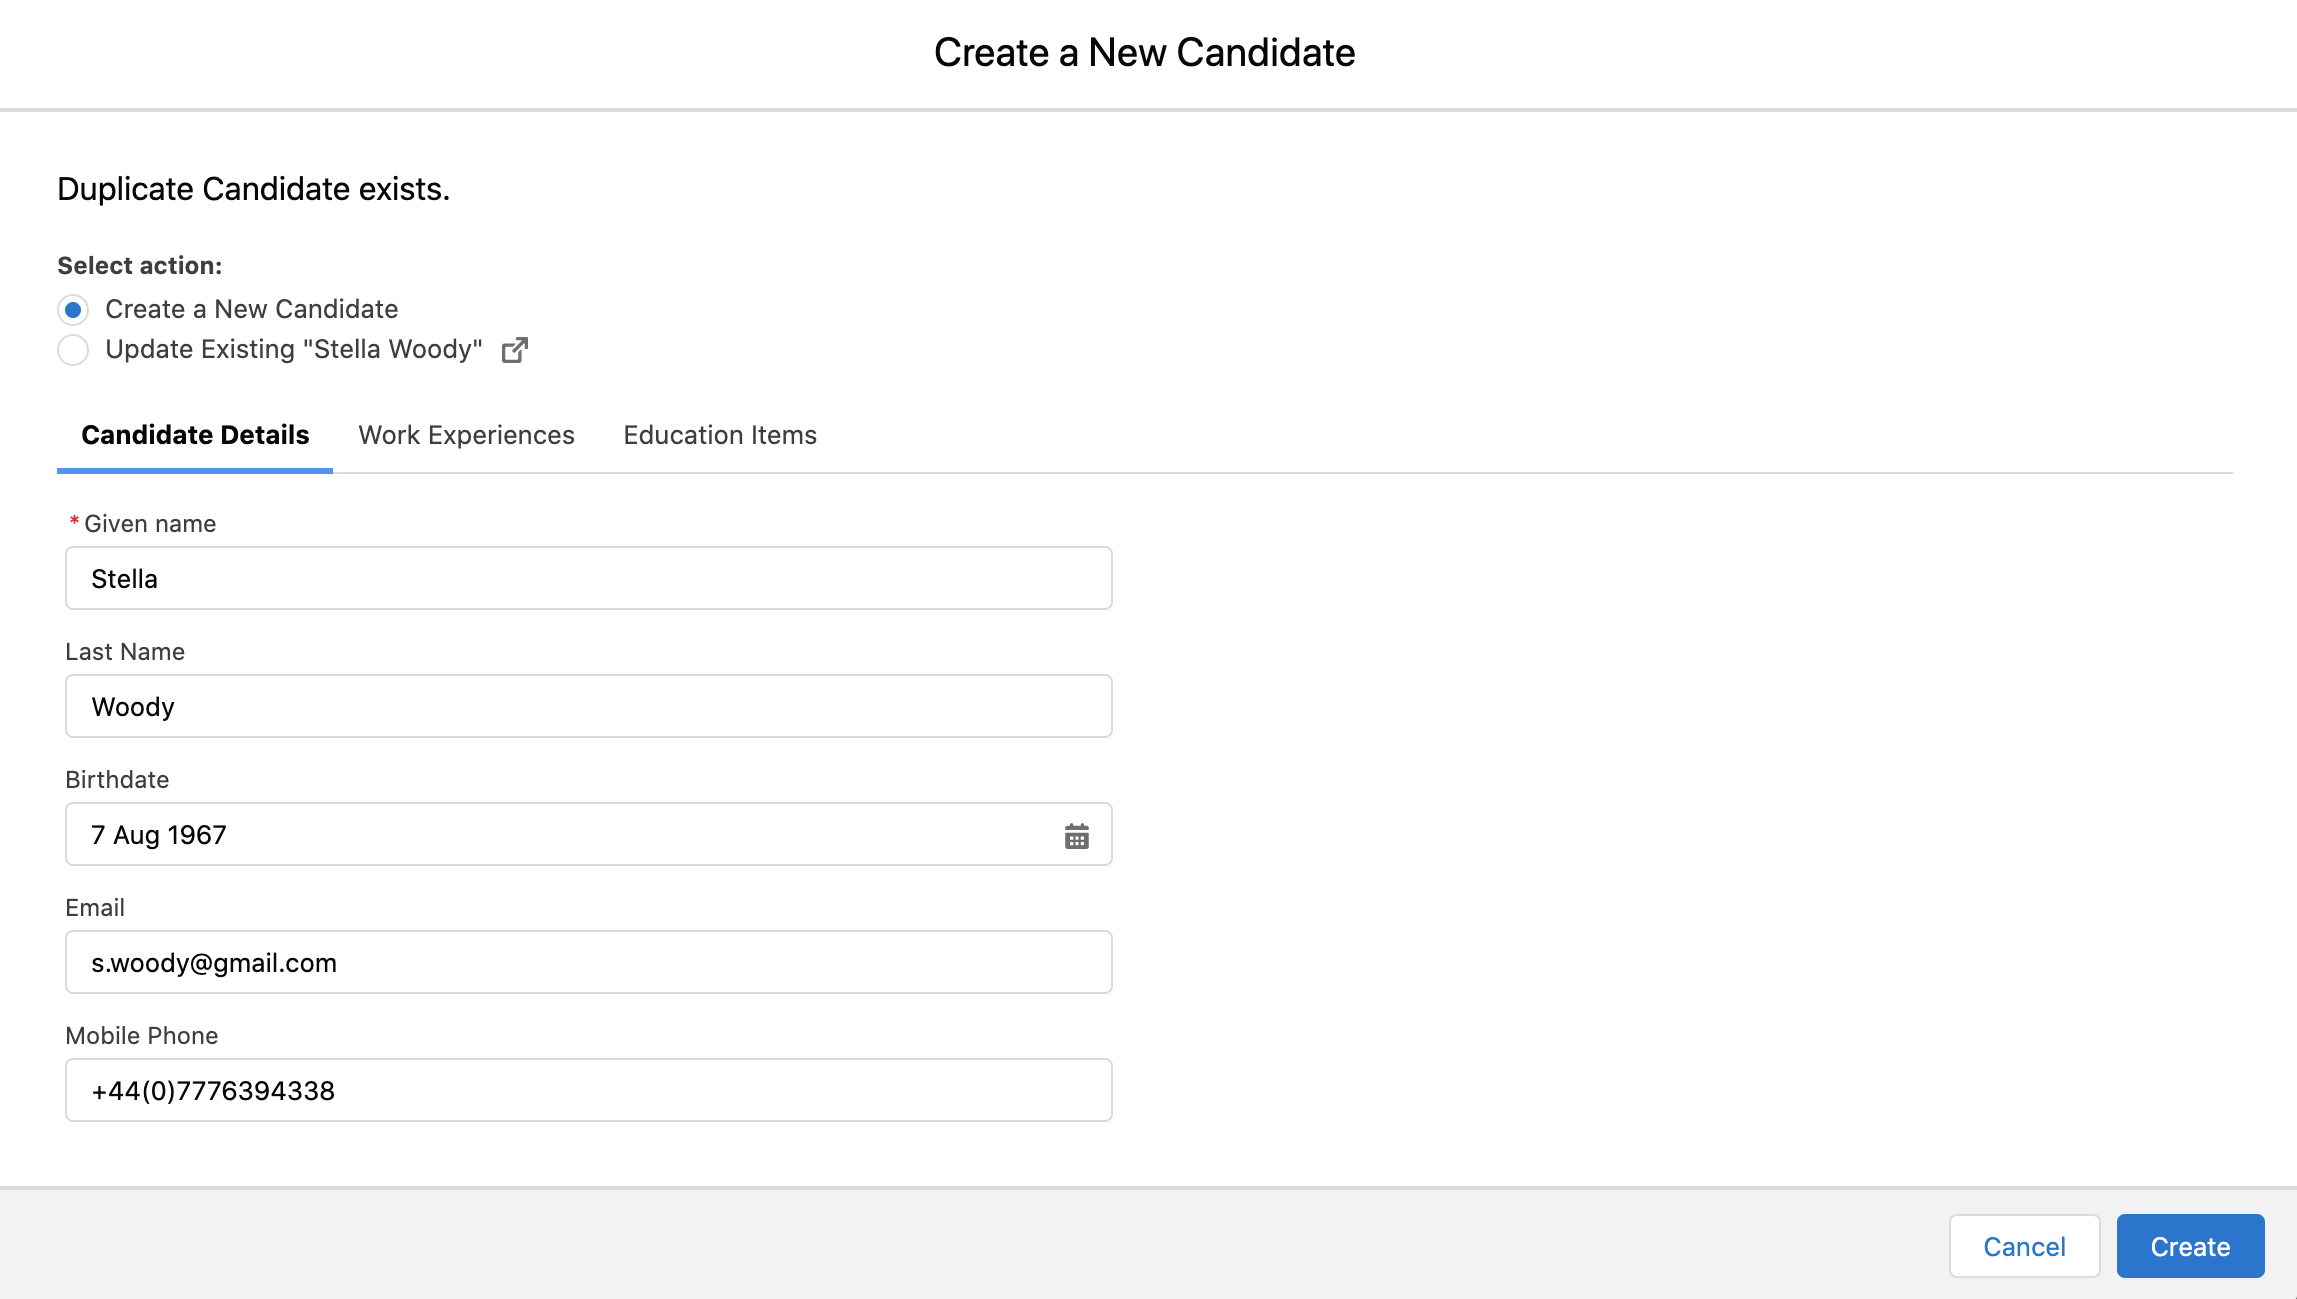
Select Candidate lookup field
If you create a Lookup relationship from the Textkernel Imported Candidate record to your specific Candidate record, then it makes workflow automation easier, and shows the user which Candidate was generated from the imported data. When this lookup is configured, the APEX function that converts Candidates will store the correct ID into this field
Select Vacancy lookup field
Oftentimes Recruiters are loading CVs in the context of a particular job opening and they want to keep track of the relationship between the imported Candidate profile and that vacancy. To record this relationship, you can select a Lookup relationship from the Textkernel Imported Candidate object to your specific Vacancy object. The relationship should be created using the Object manager, and then it can be selected here.
Map the standard parsed data fields to your Candidate record
The fields in the center column are the standard Textkernel CV parsing data fields for the integration. Parsed data is saved on a Textkernel Imported Candidate record, but this mapping records how to map the fields to your specific Candidate data fields.. When you select a particular field (eg First Name), you see a list of fields on your Candidate record which it can map to.
Note that for some coded data types, (like Nationality), you can map either the code, the descriptive label text, or both.
Map Custom (Formula) Fields
The right column is used for data transformations of the parsed data. You can set up transformations by adding custom formula fields onto the Textkernel Imported Candidate object. The formula fields then get mapped over to your specific Candidate record. This area shows the list of custom formula fields added by an Administrator, so that they can be mapped. The formulas can be useful to transform phone number formats, transform Textkernel codes into your user-specific codes, or other changes possible using the custom formula syntax.
Map the CV/Resume file🔗
Select the CV/Resume (File) item on the left side
Depending on your data model, the CV/Resume file could be linked directly to the core Candidate object, or it could be linked to a related/nested object linked to the Candidate. Both options are supported. Select the appropriate configuration matching your data model. You can also map data fields onto the file or related file object.
In some cases, you might want to set a custom property on the CV/Resume File, for example to indicate that it is a CV, or that the source was Textkernel recruiter parsing. This is supported. You can map from a custom formula field on the Textkernel Imported Candidate (TIC) object and assign the value to a custom property during mapping. To make this easier, the package already has an example custom formula field included that provide a Checkbox=True value. If you want to set other values or properties you can add additional custom formula fields to the TIC record so that they can be mapped. Note that Attachments do not support custom properties so this is impossible for them.
Map the Work Experiences object🔗
Select the Work Experiences section on the left side
The work experiences section represents the work history items of the Candidate. Select the object in your environment that represents a work experience. It must be related to your base Candidate record.
Similar to the Candidate section, map the relevant standard and/or custom fields from the Textkernel Imported Education object to your internal Education object.
Select Fieldset for Converted Work Experience
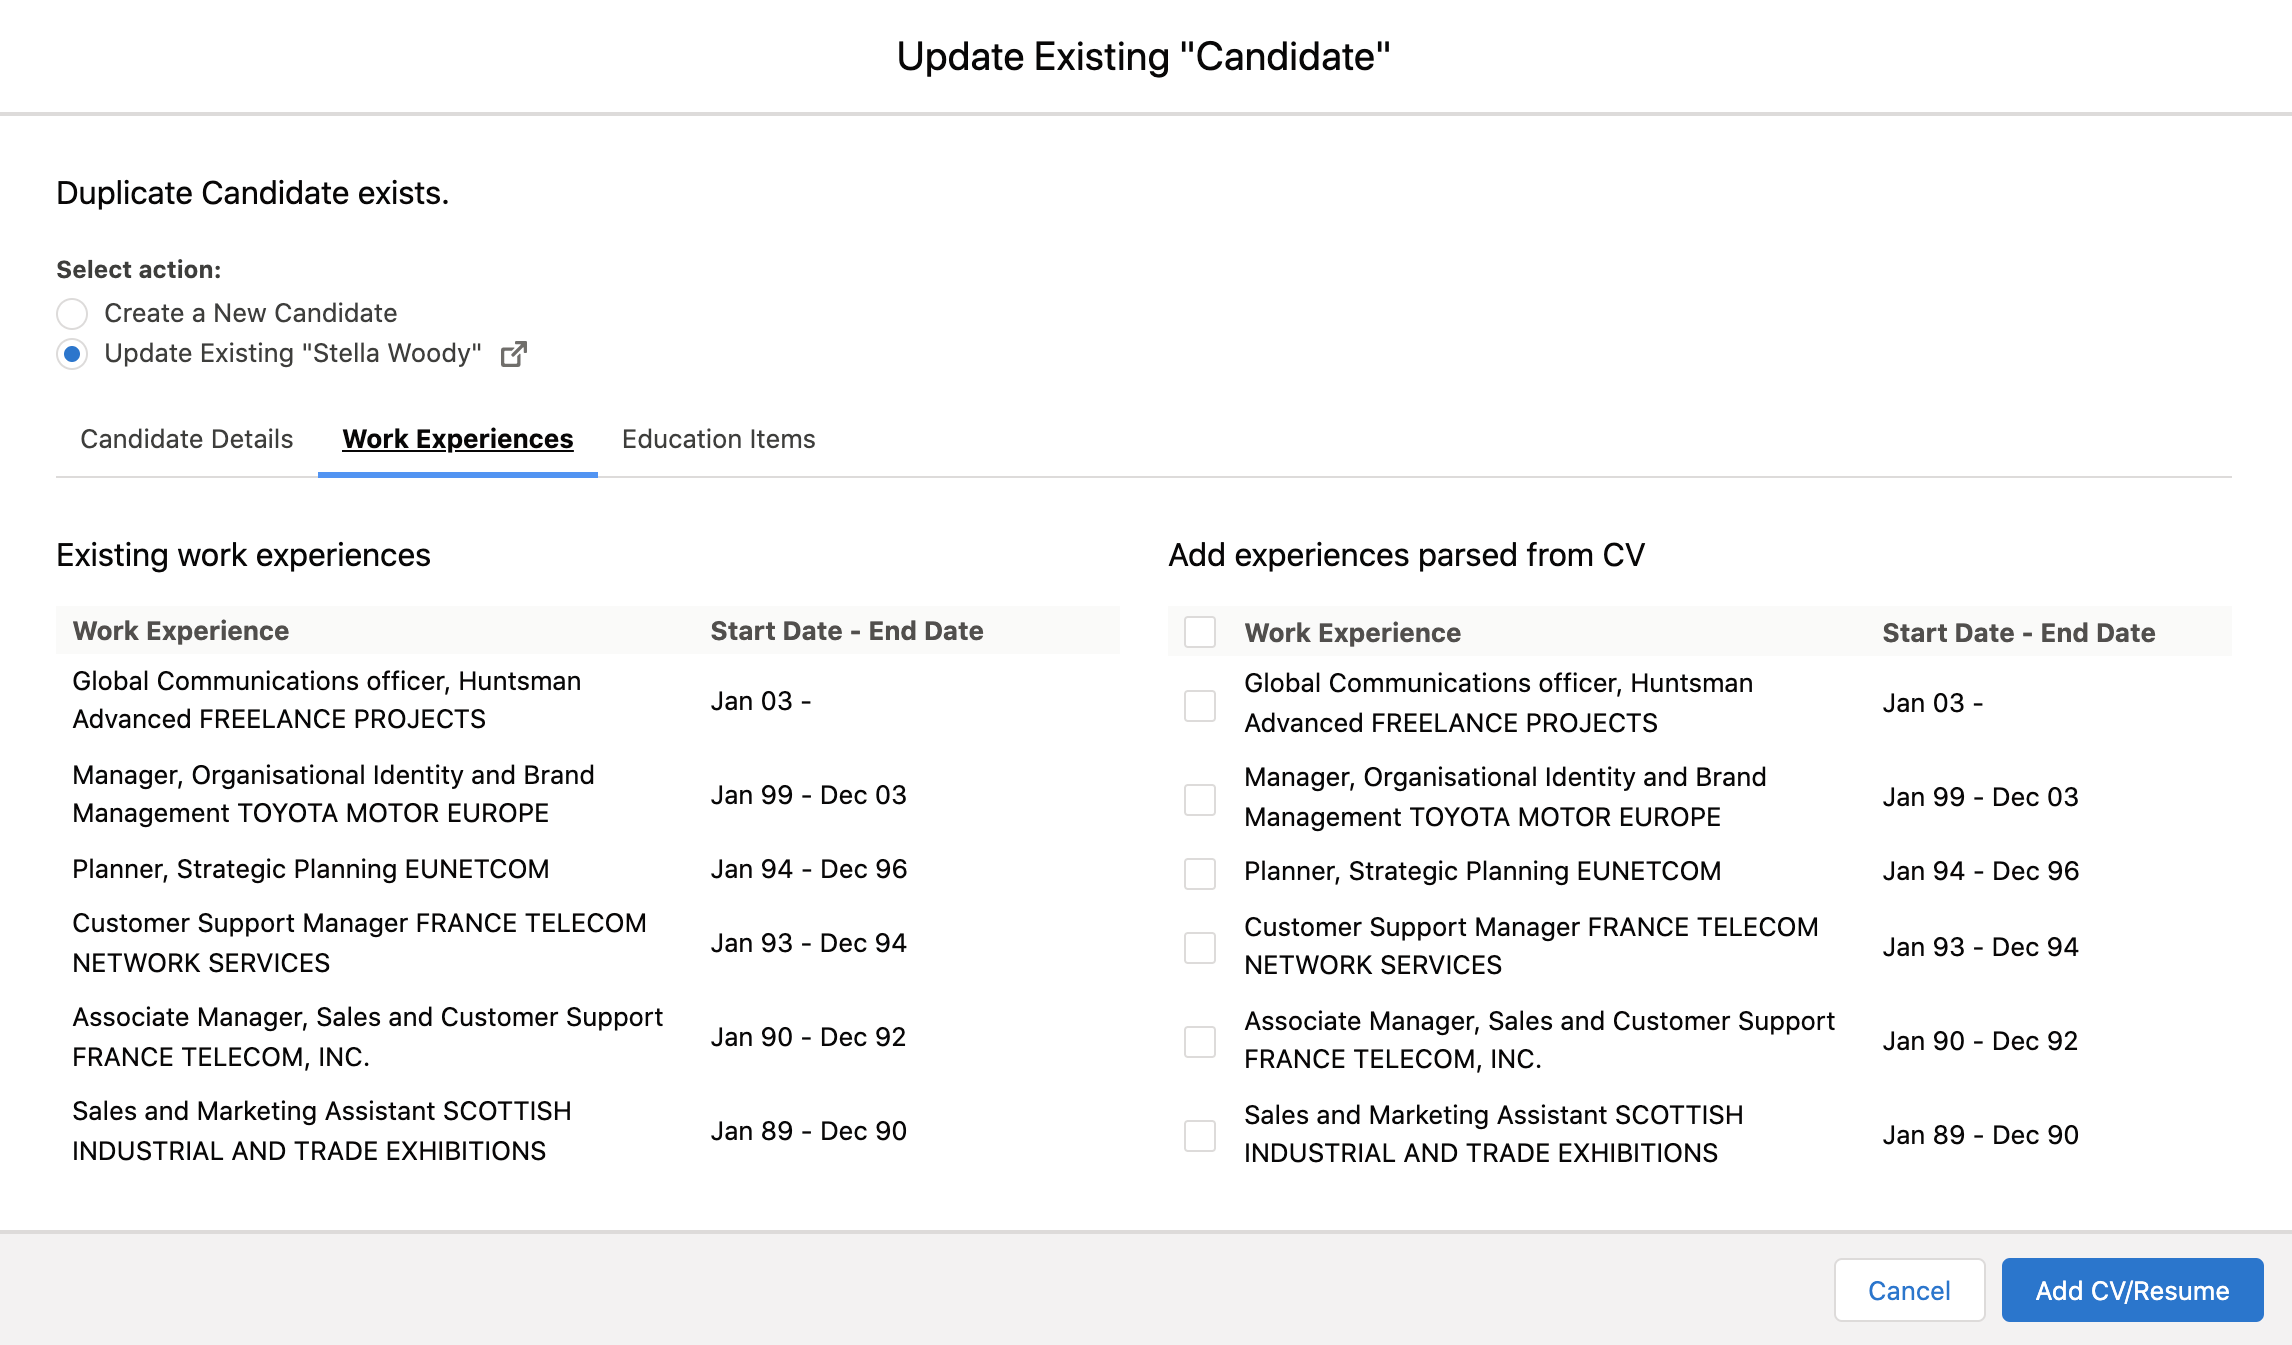
This fieldset is a list of work experience fields the Recruiter should see when reviewing a potential duplicate candidate to compare the parsed work experiences with the existing work experiences in Salesforce. Note this fieldset is NOT on the Textkernel Imported Experience.
Only the fields in this fieldset are presented to the Recruiter when they are reviewing and handling duplicate records and viewing the Work Experiences section. Based on the fields they can decide what, if any, new experiences to add. Note that only mapped fields can be presented to the Recruiter, since they are comparing parsed data against the values sitting on the converted work experience item. Formula fields on the converted work experience cannot be supported, because they cannot be mapped (ie they cannot be overwritten).
Map the Educations object🔗
Select the Educations section on the left side
The educations section represents the candidate's educational information. Select the object in your environment representing an education item. (It must be related to your base Candidate record.)
Similar to the previous sections, map the relevant standard and/or custom fields from the Textkernel Imported Education object to your internal Education object.
Select Fieldset for Converted Education
This fieldset is a list of education fields the Recruiter should see when reviewing a potential duplicate candidate to compare the parsed education items with the existing education items in Salesforce. It should be used in a similar way as the fieldset in the Work Experience section to allow recruiters to compare parsed data with the existing data inside Salesforce.
Click Save when you are finished.
Exporting and importing your data mapping🔗
When managing different sandbox and production (or partner demo/test environments), you want to be able to reuse your CV Parsing data mapping to quickly configure new orgs. To enable this, you can export the mapping to a file, and then import the mapping to quickly configure the mapping for a different Salesforce org. This saves time so that you don’t need to manually re-enter the mapping configuration each time.
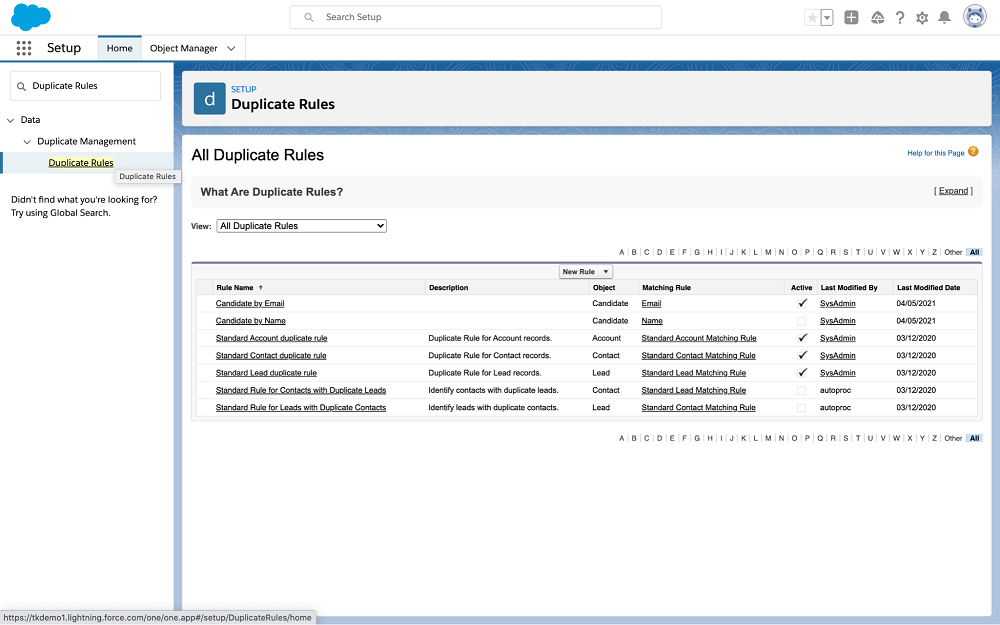
Define Candidate Duplicate Rules🔗
The integration relies on the standard Salesforce duplicate management feature to detect whether two Candidate records are likely duplicates. Salesforce has a customizable feature where the administrator can define what fields to compare in order to determine what records are duplicates. These settings are configured at Setup → Duplicate Rules. Please refer to the Salesforce Duplicate Management Documentation for details.
(Optional) Add automation to create Converted Candidate🔗
The basic parsing workflow starts when a CV/Resume file is uploaded by the Recruiter, and is complete when the extracted data has been saved in a Textkernel Imported Candidate record (and the related Textkernel Imported Education, Textkernel Imported Work Experience, and Textkernel Extracted Candidate Skill). The Recruiter can then manually review the imported data and use the quick action button to Convert the imported data into your Candidate record.
However, you can set up a Flow job (or Apex) to automatically convert the Imported Candidate record using an APEX helper function included in the package, called Convert Textkernel Imported candidate. This function uses the data mapping to copy the data across from the Imported Candidate record to the target Converted Candidate record automatically, and it also copies across the CV binary, Work Experience and Education Items if they were configured in the mapping.
The helper function also checks for duplicates using the standard Sakesforce duplicate management rules. When it detects a pre-existing duplicate record, it sets an error on the Textkernel Imported Candidate record so that the Recruiter can manually decide how to resolve it.
Example Flow to automatically Convert the Imported Candidate:
- Go To SFDC Setup → Flows → New flow button → Select Record-triggered flow → Press Next button
- Configure trigger: Select A record is updated and After the record is saved → Click Choose object → Select Textkernel Imported Candidate object
- Under Condition Requirements field: select Textkernel1__Status__c for Field, use Equals as the Operator and select “Parsed” for the Value
- Select “Only when a record is updated to meet the condition requirements” -> Press Done button
- Add Action to the screen → Set up Action: Textkernel section → Select “Convert Textkernel Imported candidate” → Set Input values: Record Id -
{!$Record.Id}→ Press Done button - Activate the flow
In addition to automatically converting the Candidate, you can also create a Flow to take an action which the Textkernel Imported Candidate status is set to “Converted”. This flow could leverage the lookup to a Vacancy and/or the link to the Converted Candidate to lookup other important information.
Mapping Skills🔗
Neither the APEX function, nor the Convert button map the imported skills automatically. Parsed skills are stored as a Textkernel Extracted Candidate Skill record linked to a Textkernal Normalized Skill. The Textkernel Extracted Candidate Skill record is also linked to the relevant Textkernal Imported Candidate. For details, please refer to the Skills Data Model documentation. There are multiple possible data models for skills, and with this approach we maintain flexibility so that we can support a range of preferred models. To use Skills, the Salesforce admin would want to use a Salesforce Flow or Apex code to copy across the skills to your particular Skill data representation.
Important
Textkernel Extracted Candidate Skill records are not de-duplicated when they are created. A record is created for each instance of a skill for each Textkernel Imported Candidate. The Textkernel Extracted Candidate Skills are not really needed once the Textkernel Imported Candidate has been converted to the target converted candidate. So, your admin should set up a scheduled job to periodically delete the old skill records from your org, according to your preferred data retention policy. Also, if your admin adds a Flow to copy skills over to the converted candidate record, a best practice would also be to de-duplicate the Skill records in that Flow, too.
Important
Textkernel Imported Skill have been updated to Textkernel Extracted Candidate Skill in the new skill data model. Customers who are using the old skill data model, will still have Textkernel Imported Skill instead of Textkernel Extracted Candidate Skill.
(Optional) Customize or translate user interface texts🔗
The labels used in the UI elements are stored as custom labels. They are defined using language that should be generic and adjust to multiple ATS workflows. The texts are defined as custom labels, so that they could be translated into other languages beyond English, and/or they could be changed if you want an alternative English language label set.
The area to manage this is SFDC Setup → Custom Labels. Please refer to the standard Salesforce documentation for more details on this.