Overview
UI Overview🔗︎
This feature has been deprecated.
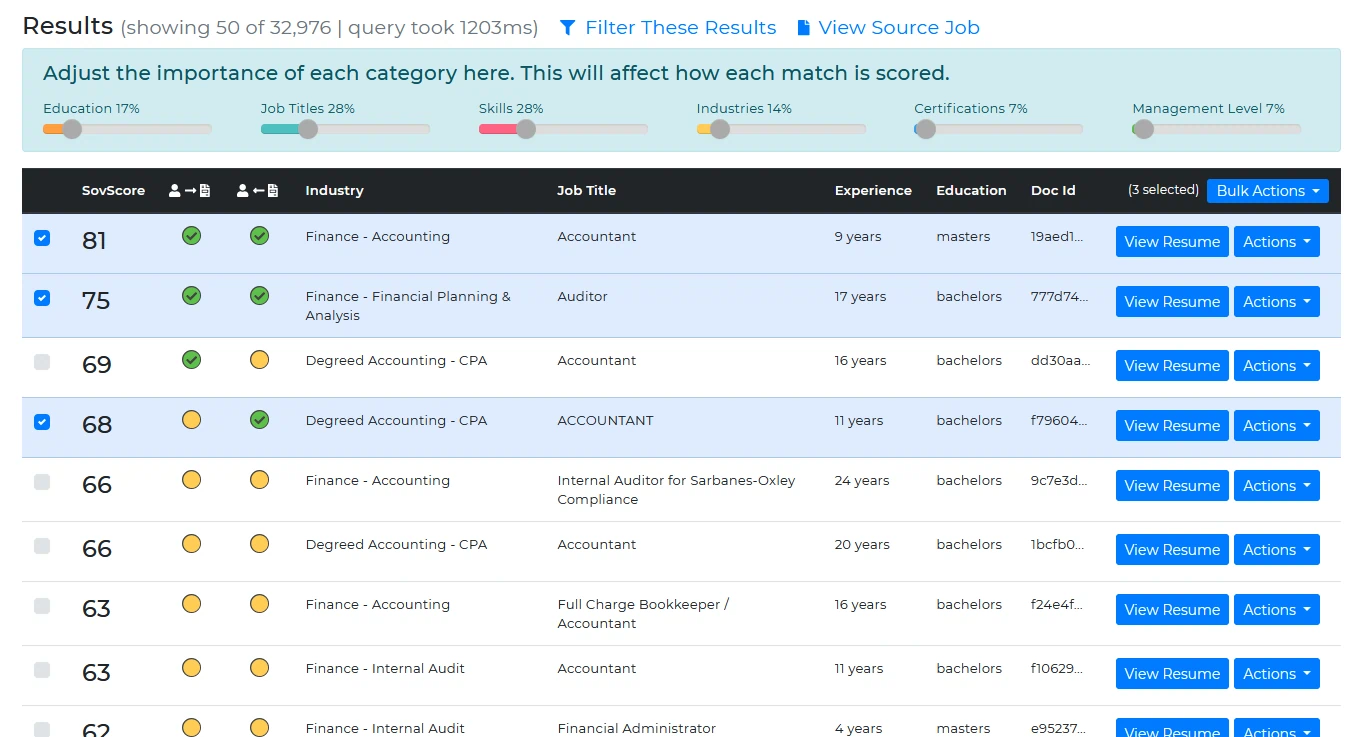
The Textkernel Matching UI provides the ability for clients to leverage a pre-built user interface for matching and searching. The interface includes forms for users to build custom match/search queries as well as a powerful query results screen. A client application can incorporate this generated UI into an iframe within an existing page, or as a separate page in the application. The generated web page contains all the necessary functionality to perform searching/matching; additionally, you can customize how the UI is generated to some extent to better suit your application. Below is a sample screenshot of the Matching UI:
Authentication🔗︎
Similar to the normal match/search SaaS requests, the Matching UI is authenticated by including you service key in the request headers. Once a specific session is generated, that URL is valid to authenticate once. A client application should redirect a user to the session immediately after generating the session for that user. The Matching UI handles authentication using bearer tokens which are stored in the client's browser. By generating the UI for a specific user and redirecting the user to the session, the UI knows which user to generate an auth token for. The URL is only secure until it is visible to a user, so you should ensure your application automatically makes the request on the user's behalf (i.e. don't make users copy/paste the link). You should not worry about users sharing links; however, as subsequent requests to the URL will require unauthenticated users to login.
Be sure to never reveal your service key to your end users in JavaScript or otherwise. It is perfectly fine for a user to know their auth token; however, as it is encrypted and is analogous to a temporary password for that user in the Matching UI. Auth tokens should not be shared between users. Ideally, your users would never see the auth token, as it is only stored in the user's browser. Add/remove/modify users in the Tx Console.
UI Customization🔗︎
The Matching UI can be customized by adding your company logo to the top banner. To manage your logo/theme options, visit the Tx Console. You can also customize which features are included in the generated UI. See the UIOptions request parameter here for more info.
Custom Themes🔗︎
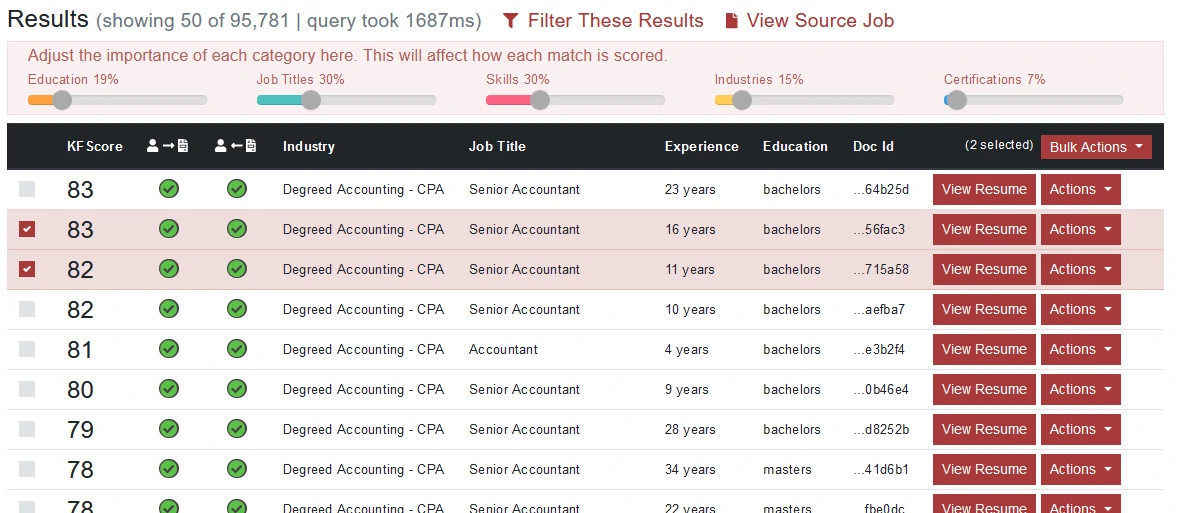
Now you can pass in a primary color, header color, font style, and specify square/rounded corners when gererating the Matching UI. The colors (and some derivations) will be used to style various UI elements. Any font you specify will be applied to all UI elements. Square or rounded corners will be applied to most UI elements. These basic theme options allow you to make the Matching UI really feel like a integral part of your system. Your users will not be able to tell they are using a third-party tool. See how to use this feature here. Here are some examples:
"Style": {
    "PrimaryColor": "#077799",
    "FontFamily": "Comfortaa",
    "FontUrl": "https://fonts.googleapis.com/css2?family=Comfortaa:wght@400;500;700&display=swap"
}
Generates:
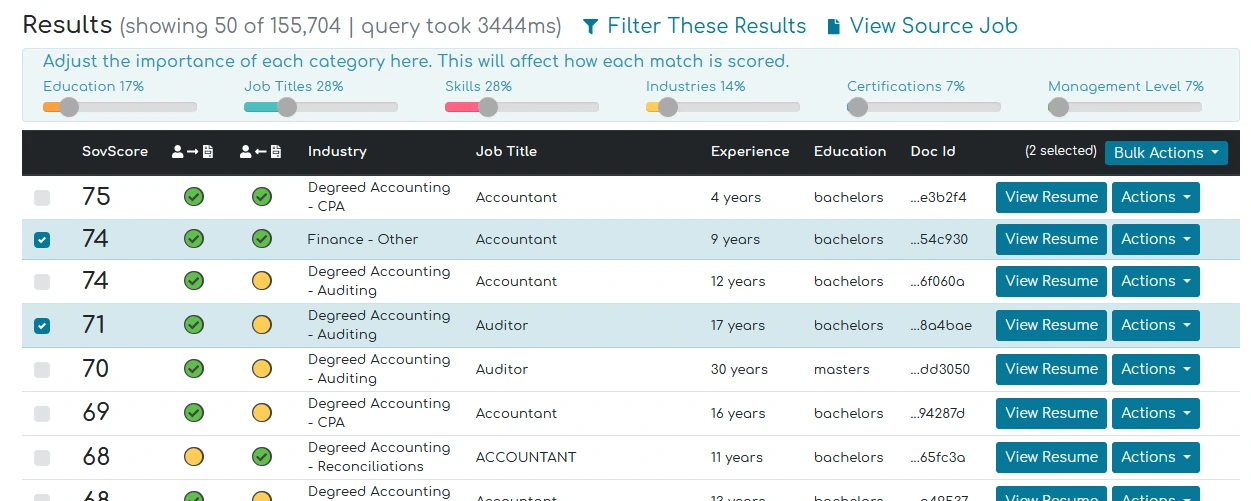
"Style": {
    "PrimaryColor": "#a83a3a",
    "HeaderColor": "#999999",
    "FontFamily": "Arial",
    "SquareCorners": true
}
Generates:
Hooks🔗︎
In order to make the Matching UI more useful in your client application, we have added the ability for users to take actions on documents that are found in search/match results. There are two different types of hooks - client-side hooks and server-side hooks. These hooks are defined in the UIOptions.Hooks parameter you pass when you create a Matching UI session (see here).
Client-side Hooks🔗︎
These hooks simply show a webpage (with a GET request). As an example of a client-side hook, you may want to have a 'Show Contact Info' action in your ATS. You could set up an endpoint in your ATS such as https://my-great-ats.com/info/(resumeId). You could then pass in a client hook as follows:
{
    "LinkText": "Show Contact Info",
    "UrlAction": {
        "Url": "https://my-great-ats.com/hire/{id}",
        "Target": "tx"
    }
}
This would open a popup within the Matching UI that displays the webpage from your system showing the contact info for whichever resume the user clicked 'Show Contact Info' on. For more information about accepted values for
Target, see here.
A client-side hook can either have a UrlAction or a JsAction. A UrlAction can either show a webpage in a popup within the Matching UI, or behave like any normal <a> tag (where the Target could be _blank, etc). A JsAction will send a message via a window.postMessage() that can be received by a JavaScript event listener in your system. Then you could run any Javascript you wanted. Read about window.postMessage() here. For API spefics, see details about how to define a UrlAction or JsAction in a client-side hook.
Here we'll go through an example of how the JsActions work. For this example, we'll assume you are using an iFrame within your system to host the Matching UI. When you create the session, you pass something like:
{
    "LinkText": "Show MyAts Popup",
    "IsBulk": false,
    "JsAction": {
        "Target": "parent",
        "TargetOrigin": "https://my-great-ats.com/",
        "Data": "show_my_popup"
    }
}
Then, in your system, you would add some JavaScript like the following:
window.addEventListener("message", receiveMessage, false);
function receiveMessage(event) {
    //be sure to do this check for security purposes
    //if your account is in the EU data center, use https://api.eu.textkernel.com/tx or
    //if your account is in the AU data center, use https://api.au.textkernel.com/tx or
    if (event.origin.startsWith("https://api.us.textkernel.com/tx")) {
        //for a non-bulk action
        var docId = event.data.DocumentId;
        var indexId = event.data.IndexId;

        //for a bulk action, the following is an array where each item has a DocumentId and an IndexId
        //var documents = event.data.Documents;

        var myData = event.data.Data;

        if (myData === "show_my_popup") {
            alert(docId); //this alert will show in your system when a user clicks the "Show MyAts Popup" button in the Textkernel Matching UI
        }
    }
}
Server-side Hooks🔗︎
Server-side hooks are intended to perform some action within your system on behalf of a user. They will perform an HTTP POST to whatever URL you provide. You specify them as follows:
When the user clicks the action, a POST will be executed to the given URL. The POST body will look like the following for a non-bulk action:
The POST body will look like the following for a bulk action:
The
CustomInfocan be any data from your system that you need to associate with the Matching UI session (job id, auth token, etc). When you create a session, you can pass in this information (in whatever object structure you like) in theCustomInfoproperty of a server-side hook (see here). When a user performs an action via a POST hook, that information is included in the request body shown above. This empowers you to customize your user interaction between your system and our Matching UI.
For POST hooks, your system has the option of responding with a UrlAction or JsAction in the response body. If you do this, the Matching UI will execute that action immediately. The JSON for these is exactly the same as if you were sending the UrlAction or JsAction in as a client-side hook. See here for more information.
OnUpdate Hook🔗︎
This hook gives you the ability to capture/save when a user makes category weight changes or modifies filter criteria and re-runs the query. You specify the hook as shown below, and the Matching UI will send the category weights and filter criteria in the POST body (or postMessage() data). The full API documentation is here, but we'll give some quick examples below. There are two options for the OnUpdate hook. The first (and probably most common) use-case is specifying a 'Server' hook as follows:
Whenever a user modifies weights or filter criteria and re-runs the query, an HTTP POST will be made to the given URL with the following body:
The
PreferredCategoryWeightsproperty contains the category/weight data. More info can be found here. TheFilterCriteriaproperty is an object containing all of the current filters. More info can be found here. TheCustomInfoproperty will contain whatever you passed in when specifying the hook.
The other use-case available to you is simply using window.postMessage() to pass the weights/filters data to your client-side code. This is very similar to how a JsAction works above. The hook would be defined as follows:
See the section above on JsActions to see what options are available and how to properly handle the
postMessage()call in your client-side Javascript. The 'message' sent viapostMessage()will contain the FilterCriteria and PreferredCategoryWeights data.